Showing posts with label Belchior Dias. Show all posts

11 August 2011

No additions to this blog the last days, but some progress is made!


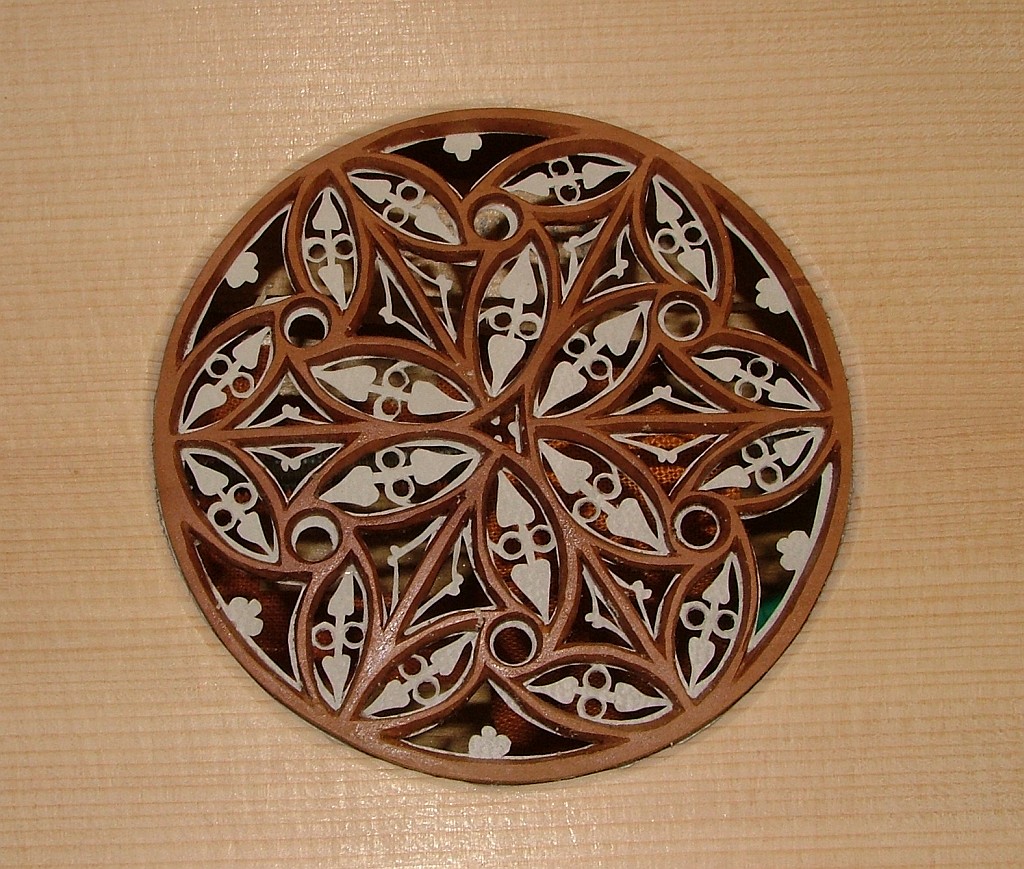
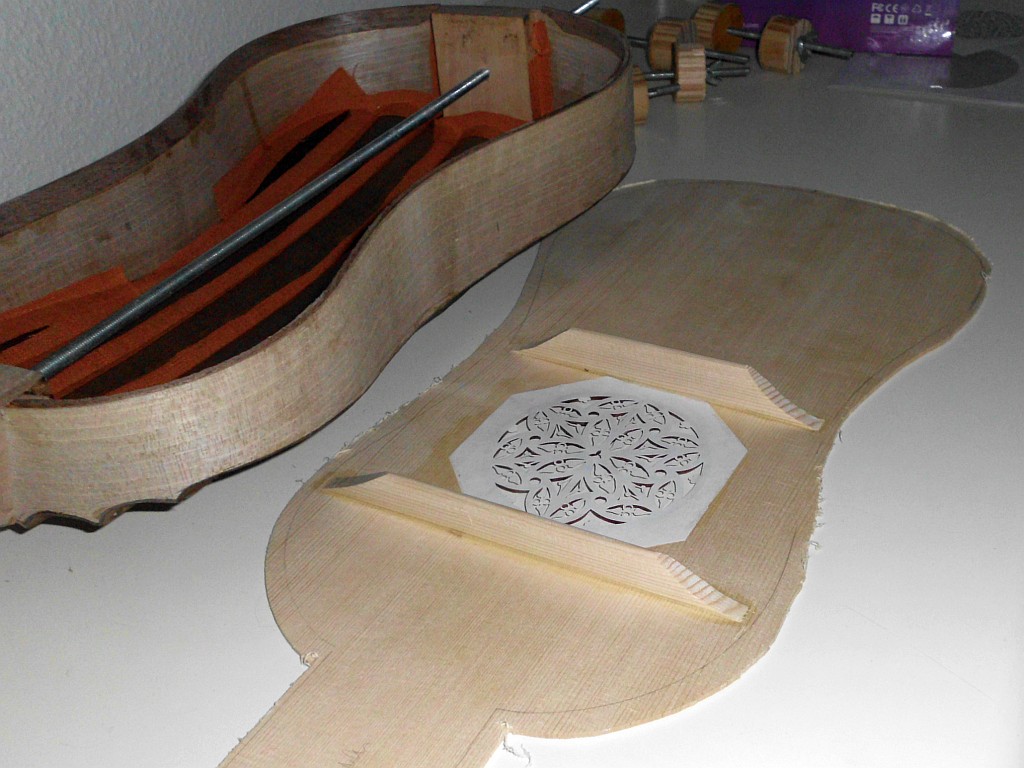
part one of the rose cut from pear
and part 2 cut from parchment.
The pattern printed on paper and glued on top of the parchment with removable contact-glue.
With light from below on a glass surface. With minimal pressure on the (sharp) knife you don't cut the glass resulting in a blunt knife-tip....

part one and two glued together

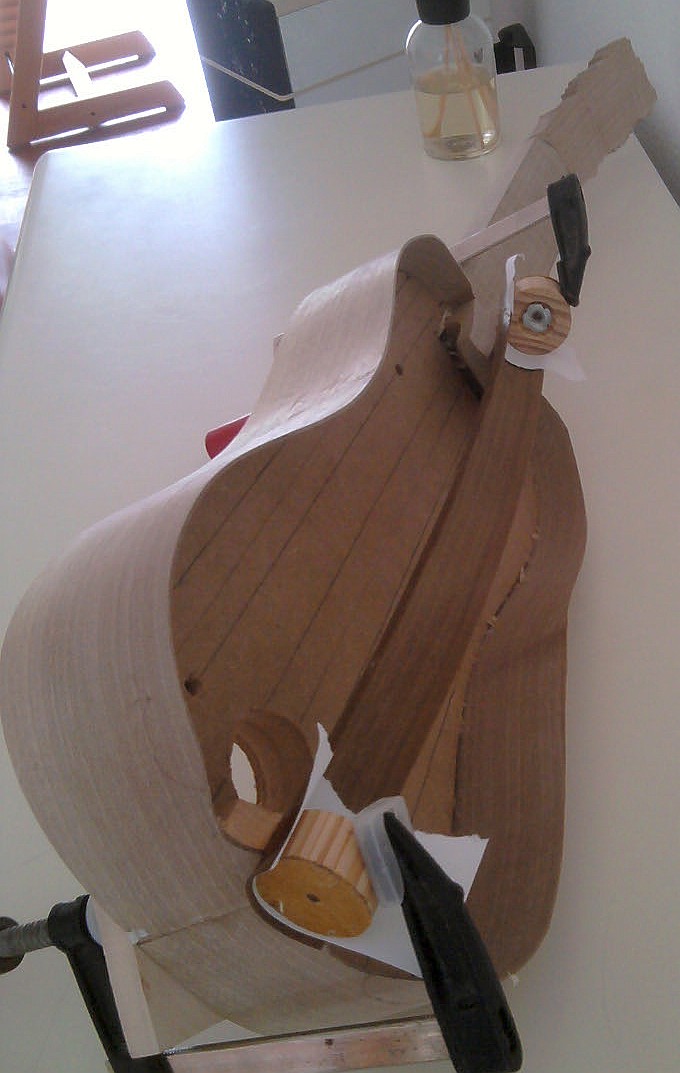
Linings in the body to support he joint with the top

Fitting the two bars

The result after shaping the bar-ends
And to complete the top the bridge (from rosewood) ....


30 July 2011

Back of Dias 2 nearly finished

No messeges on this blog for nearly 2 weeks.
T hat does not imply that no work has been done!
Since the 17th. I've nearly fitted them all.


The exterior 2 ribs have been bent a bit different from the others.
On the outside they are more a less flat.
In the lower left corner of the picture you can see the end of the last rib to be fitted.
Hope to fit that one tonight.

17 July 2011

Bending ribs for Dias 2

After a week soaking in an alcolhol/amonium mixture I've taken some strips out

The plan was to alternate lighter and darker ribs, but that's kind of hard to distinguish now (I had numbered the ribs from 1 to 7 but the numbers have disapeared....)
The liquid has become very dark. Al lot of coulour must have been washed out of the wood.
I think the dark colour of the nutwoot has now quite evenly spread through all of them.
 (Was this colour not the main ingredient of van  Dyke's Crystal?)


Immersing the wooden strips for a short time in boiling water makes them very soft and bendable.
I've tied them to the molds that I had already prepared for the previous instrument


Bent three of them now. No crack's like in the ash I used on the previous instrument.
Nut is a lot easier to handle.

10 July 2011

Dias 2

Some time ago I started on the second Dias vihuela. (Original size).
Today I'm bending and fitting the sides to the neck and end-block.

17 May 2011

It's working!!!!!


After a couple of hours work (fitting the pegs, nut, strings and tying the frets) the time has come to start playing.
The construction is holding so far. The first sounds are promising.

15 May 2011

Small parts

After applying the 3rd layer of varnish it's time to prepare and collect the smaller parts.
My first set of strings (Nylgut, string lengt 645 mm, E-tuning)
  1. 0.42 (or 0.44)
  2. 0.54
  3. 0.70
  4. 0.85
  5. 1.12
  6. 1.45 (wound or 'solid' nylgut

Instead of turning the tuning pegs I've decided to order prefabricated rosewood violin pegs from Dick.
It's the 1/8 violin model. The thinnest available just the right length.
Definitely not the most appropriate design for a vihuela, but an easy way to get the instrument ready.
I made the pegs a bit thinner and the edges sharper. (Don't like the soft, sanded form very much)
(left the 'enhanced' version)

14 May 2011

First layer of varnish

After scarping and sanding I applied one layer of 'vernice bianca' (egg white with gum arabic).
To add some colour to the top I've applied a second layer with a tiny bit of van Dyke's crystal added. (only on the top).

<== With the first layer of varnish the result looks like this ==>

12 May 2011

fitting the fretboard

The fretboard is made of rosewood.
Not ornamented als in the original.


After preparing he pieces
And the result:

11 May 2011

Working outdoor...

Yesterday evening working in the outdoor workshop...
Glueing the top to the body


09 May 2011

the bridge: guitar or vihuela?

I still regard this instrument -  and its ancestor the Belchior Dias instrument - as a vihuela.
When I was working on the bridge however I made up a way to devide the sting-holes in a manner that would accomodate both stringing with 6 courses as a vihuela and with 5 courses as an early guitar.

The second hole (i.e. the first of the d'-course) can equally be used as e' for the guitar.

Transforming the instrument to guitar thus only require a set of strings. Might be worth while to try.
I don't have a baroque guitar (yet).....

08 May 2011

Rose ready ... now the bridge

Good progress today
Finished the cutting of the parchment layer and glued the two layers together
Sawed/cut the sound hole in the top and fitted the rose

And started on the bridge after fitting the bars on the inside of the top.

It begins to look like a vihuela!

06 May 2011

Cutting the parchment rose

On this picture you can see the parchment with the paper design on top.
Putting it over a ground glass plate with light underneath makes it easier to see the cuts.

I've done 2/3 now so hope to finish the rose tomorrow evening 

04 May 2011

the rose in progress

With carbon paper I transfered the design of the upper part of the rose to the pearwood.
Drilled holes, sawed the figures with a fretsaw. On this picture you can also see the separate designs of the upper and lower parts of the rose.


After shaping the edges with a small chisel and a knife the result looks like:


Next: cutting the lower part from the piece parchment that is lying under the pearwood rose.
The trick I used on the earlyer roses was to glue the paper design on the parchment with reovable glue and cut through the lines of the design.

01 May 2011

thoughts about the rose

Time has come to think about the size and shape of the rose.
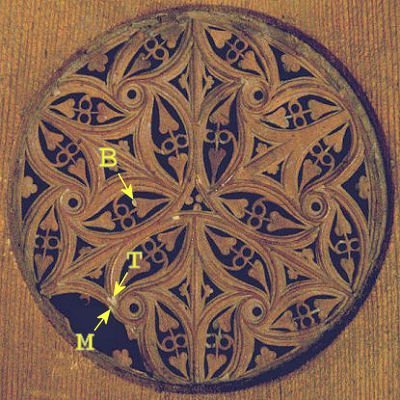
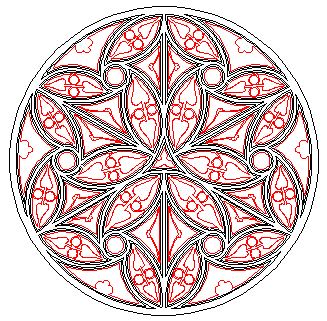
One of the designs that I like is that of the Chambure vihuela.
(Photo from www.vihuelademano.com, gif-image from the website of  Oliver Wadsworth)


Unlike the original on the left picture mine will definetely not be of 3 layers of parchment reinforced woood but 'simply' one layer of pearwood (black in the drawing) with one layer of parchment (red in the drawing)

26 April 2011

Lining

This is how the inside looks after adding a lining to all the seams.
Very sturdy construction now.

25 April 2011

final ribs of the back fitted!

Yesterday evening I fitted the last rib of the back so today the body could be removed from the mold.
The instrument kept its form perfectly!

The weight of the instrument in the current stage: 475 gr.

Some pictures of the result:

The form is not as regular as it should be. 
It was no easy task to make the edges of the ribs meet each other at the right heigth.

I put a piece of threaded wire in the body from bottom block to neck to stabilise the form of the body.
On the picture below you can see that the 2nd join from the left is to deep.

The yellow arrows mark the spots were the edges of the ribs are not connected. You can see the april sun through them. (After applying linnen linings over all the seams this wil be OK I presume.) 
A detail from the connection between the ribs and the neck.
At the left side the fitting is not 100% perfect but sufficient. On the right side it is better than I expected to be possible.